Custom UI Tutorial

Talk here about anything related to the Custom Interfaces. Tutorials and so on.
User avatar
GMSignPainter
Site Admin
Posts: 2840
Joined: Fri Oct 09, 2009 10:18 pm
Location: Lyon - France
Contact:

Custom UI Tutorial

Postby GMSignPainter » Fri Feb 10, 2012 7:21 am

Dear Players,

With the new UI system and the ability for any of you to make Custom UIs, some explanations are needed about how to make them.

First of all, all the UI files will be located in your "Data/UI" folder.
There, with a normal installation of DR, you should find the following files:
http://s4.noelshack.com/old/up/1-ec563e8988.png

Let's look at the uilist.ui file:

Code: Select all

MonsterWarInfos
MainInterface
QuickMagic


This file contains contains the names of all the other .ui files. So if you wish to add a new UI into the game, you must add a line into that file.

Let's add a line and let's call it PlayerInfos:

Code: Select all

MonsterWarInfos
MainInterface
QuickMagic
PlayerInfos


Now make a new text file in the folder and call it PlayerInfos.ui
http://s4.noelshack.com/old/up/2-db16d20068.png

Let's open it.
First, you need to put the main block of the UI by adding the following code:

Code: Select all

UIName=PlayerInfos
{

}

As you can see, we set the name of the UI there also (the name we set in the uilist.ui is only the file name, not the actual UI name)

We first need to place our UI on the screen. To do so, we have 2 possbilities.
Set the top left corner coords.
Set the origin coords (center of the UI).
I will set it by its origin like this, at the center of the screen:

Code: Select all

UIName=PlayerInfos
{
   ox=400
   oy=300
}

Then, we need to set its width and height. If you plan on adding a Background (highly recommanded !), the best way to do is to tell it to get it from the background's image:

Code: Select all

UIName=PlayerInfos
{
   ox=400
   oy=300
   SizeFromElement=Background
}


Then, as we set its size from the Background, let's add that background !
To add a new "Element" or "Widget" in the UI, you must add a new block called "UIElement", like this:

Code: Select all

UIName=PlayerInfos
{
   ...coords & size...
   UIElement=Image
   {

   }
}

Image sets the kind of Element to be an Image (logic !), a complete list of Elements is available at the bottom of this tutorial.
Now let's look at that Image.
First, we must give it a name (very important !):

Code: Select all

UIElement=Image
{
   name=Background
}

Then, we must set its relative coords:

Code: Select all

UIElement=Image
{
   name=Background
   relx=0
   rely=0
}

relx is the relative X coord and rely is the relative Y coord. By relative this means their coord in the UI, not on the screen. The 0,0 point is the top left corner of the UI.
And finally, as it is an image, we must set an image !

Code: Select all

UIElement=Image
{
   name=Background
   relx=0
   rely=0
   image=Data/UI/Resources/Extra/Background1
}

Attention, the UI Images must be of the .csp extension and we will NOT provide any tool to make .csp images ! However, we will provide progressively enough .csp to make any kind of UI you want (and we may add later on other kind of image types such as .png)

The minimal code of our UI is done ! However, it wont be shown on the screen as nothing calls it.
To do so, we must edit an existing UI and add a Button which will call it.
So, open MainInterface.ui and scroll down until the bottom:

Code: Select all

UIName=MainInterface
{
   ...
   UIElement=ItemIcon
   {
      name=ItemQuick5
      relx=592
      rely=69
      shortcut=5
   }
}

And let's add a new TextButton Element after the ItemIcon called ItemQuick5:

Code: Select all

UIName=MainInterface
{
   ...
   UIElement=ItemIcon
   {
      name=ItemQuick5
      relx=592
      rely=69
      shortcut=5
   }
   UIElement=TextButton
   {
      name=PlayerInfosButton
      relx=210
      rely=28
      text=Click Me!
      action=PlayerInfos
      type=OPEN_UI
   }
}

Let me explain the following code:
name, relx and rely, we have seen before what those were.
text: It is the text of the button, which will appear on the screen.
action: It is the action which is executed when the button is clicked. We put there the name of our new UI.
type: It is the type of action the button executes. As we open an UI, we set OPEN_UI.

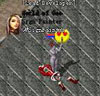
Alright, let's save the file and check what appears ingame !
http://s4.noelshack.com/old/up/3-08c7010062.jpg
http://s4.noelshack.com/old/up/4-39976f0560.jpg

Next time I will show how to add some stuff in our UI ;)

User avatar
GMSignPainter
Site Admin
Posts: 2840
Joined: Fri Oct 09, 2009 10:18 pm
Location: Lyon - France
Contact:

Re: Custom UI Tutorial

Postby GMSignPainter » Fri Feb 10, 2012 8:02 am

Second Part
Well, we've got our new UI to be shown, but it's a bit empty, isn't it? So let's add some content in it !
As we've called it PlayerInfos, let's add some infos regarding the player in it.

First, we would like to show the player's name.
We can do it using the Text Element:

Code: Select all

UIElement=Text
{
   name=PlayerName
   relx=10
   rely=10
   r=233
   g=233
   b=233
   text=#HeroName
}

Let's have a look at some new proprieties in there:
r, g and b are the text's color. r being Red, g Green and b Blue. There values go from 0 to 255.
now text=#HeroName, what does #HeroName mean? Adding a # between a word for a text is a tag to tell the game it is a pre-defined text, HeroName being the name of that text. In this case, #HeroName is the tag to display the Character's name. A complete list of pre-defined texts will be available at the end of the topic.

Let's have a look at the result:
http://s4.noelshack.com/old/up/5-ec718fb957.jpg
It works !!!

User avatar
GMSignPainter
Site Admin
Posts: 2840
Joined: Fri Oct 09, 2009 10:18 pm
Location: Lyon - France
Contact:

Re: Custom UI Tutorial

Postby GMSignPainter » Fri Feb 10, 2012 8:47 am

Now let's add a HP and MP Gauges to our UI.

We will for this use the Gauge Element, declare it like this:
HP Gauge:

Code: Select all

UIElement=Gauge
   {
      name=HPGauge
      image=Data/UI/Resources/Extra/RedHGauge
      relx=10
      rely=25
      width=90
      type=HORIZONTAL
      adjustx=2
      adjusty=2
      alpha=13
      now=#HPNow
      max=#HPMax
   }

Let's have a look at the different proprieties:
image : The image used for the Gauge. Attention ! Only images ending with "_empty", "_full" and "_fill" are allowed for Gauges !
width : Is the size of and Horizontal Gauge. If the Gauge was set as Vertical, height should be used instead.
type : Is the type of Gauge, either HORIZONTAL or VERTICAL
adjustx and adjusty : Is were the Gauge is filled in the image, basically a few pixels down/right from the top left border.
alpha : This propriety is also available for images and some other Elements. In this case, it defines the transparency of the Gauge (Attention, the Alpha doesn't really go from 0 to 255, afaik it more or less goes from 0 to 35, this isn't a decision from me but from DR's original code...)
now and max : Are the values for the Gauge. max is the maximum value and now is the current value. Tags are put in order to ask the game the values.

Now let's make the MP Gauge the same way:

Code: Select all

UIElement=Gauge
   {
      name=MPGauge
      image=Data/UI/Resources/Extra/BlueHGauge
      relx=10
      rely=38
      width=90
      type=HORIZONTAL
      adjustx=2
      adjusty=2
      alpha=13
      now=#MPNow
      max=#MPMax
   }


Alright, our Gauges are made, let's have a look ingame.
http://s4.noelshack.com/old/up/6-2b81552367.jpg

User avatar
GMSignPainter
Site Admin
Posts: 2840
Joined: Fri Oct 09, 2009 10:18 pm
Location: Lyon - France
Contact:

Re: Custom UI Tutorial

Postby GMSignPainter » Fri Feb 10, 2012 9:03 am

Last part of this tutorial, we will add a button to close our UI.

To do so, we must add a ImageButton Element :

Code: Select all


   UIElement=ImageButton
   {
      name=Exit
      image=Data/UI/Resources/Extra/Exit
      relx=20
      rely=55
      action=PlayerInfos
      type=CLOSE_UI
      shortcut=C
   }


This button is made nearly the exact same way as the TextButton but let's look at the differences:
First we must set an image for the button. Attention, only the images with "_normal", "_highlighted", "_pressed" and "_disabled" at the end are allowed unless you add the propriety "uniqueimage=1".
As you can see, we still reference the UI name in the "action" propriety but we changed the type to "CLOSE_UI".
Also, we added a "shortcut" propriety. This allows you to set a keyboard shortcut for the button. This also works for TextButtons.

Alright, let's have a look ingame:
http://s4.noelshack.com/old/up/7-517386f126.jpg
http://s4.noelshack.com/old/up/8-2c99163588.jpg
http://s4.noelshack.com/old/up/9-b039e70a66.jpg

User avatar
GMSignPainter
Site Admin
Posts: 2840
Joined: Fri Oct 09, 2009 10:18 pm
Location: Lyon - France
Contact:

Re: Custom UI Tutorial

Postby GMSignPainter » Fri Feb 10, 2012 9:16 am

The UI Proprieties

Code: Select all

x

The absolute X coordinate of the top-left corner of the UI on the screen (minimum is 0, maximum is 800)

Code: Select all

y

The absolute top coordinate of the top-left corner of the UI on the screen (minimum is 0, maximum is 600)

Code: Select all

ox

The absolute X coordinate of the center of the UI. (minimum is 0, maximum is 800)

Code: Select all

oy

The absolute Y coordinate of the center of the UI. (minimum is 0, maximum is 600)

Code: Select all

w

The Width of the UI. (minimum is 0, maximum is 800)

Code: Select all

h

The Height of the UI. (minimum is 0, maximum is 600)

Code: Select all

SizeFromElement

Tells the UI to gets its size from the size of an element (usually taken from the background as it's the biggest element in the UI)

Code: Select all

permanent

When set to 1, makes an UI unable to be closed by pressing Escape or Space. The UI can however still be closed from another UI.

Code: Select all

active

When set to 1, makes an UI visible by default when the game is launched.

Code: Select all

priority

When set to 1, every opened UI (except permanent ones) get closed. The default value is 1.

Code: Select all

silent

When set to 1, the UI produces no sound on opening/closing.

Code: Select all

OpenSound

The sound which is played when the UI is opened (found in the Sound folder)

Code: Select all

CloseSound

The sound which is when the UI is closed (found in the Sound folder)

User avatar
GMSignPainter
Site Admin
Posts: 2840
Joined: Fri Oct 09, 2009 10:18 pm
Location: Lyon - France
Contact:

Re: Custom UI Tutorial

Postby GMSignPainter » Fri Feb 10, 2012 9:42 am

The Elements/Widgets and their proprieties

Common proprieties

Code: Select all

name

Sets the name of the Widget, never forget this propriety. Also, the names order the Widgets on the screen. A Widget called "Button" will be drawn before a widget called "Text".

Code: Select all

relx

Sets the relative X coordinate on the UI.

Code: Select all

rely

Sets the relative Y coordinate on the UI.

Code: Select all

hidden

If set to 1, the widget will not appear.

Code: Select all

disabled

If set to 1, clicking on the widget will have no effect.

ImageButton
A button with an image which will execute an action when clicked on or when its shortcut is pressed.

Code: Select all

image

Sets the relative path of the image the button is using. The images used for the button must end with "_normal", "_highlighted", "_pressed" and "_disabled", unless uniqueimage is set to 1

Code: Select all

action

Sets the action which will be executed when clicking on the button. If the type is set the OPEN_UI or CLOSE_UI, the action must be the targeted UI's name.

Code: Select all

type

Sets the action type of the button. The default on is FUNCTION, see below for a complete list of available functions. OPEN_UI and CLOSE_UI open and close the targeted UI set in the action propriety.

Code: Select all

uniqueimage

Sets that the button only have one image for all its states.

Code: Select all

shortcut

Tells the game to execute this button's action when the referenced key is pressed. (The shortcut keys must be set in upper case !)

Code: Select all

silent

If set to 1, makes no sound when pressed.

Code: Select all

sound

The sound which is played when the button is clicked (found in the Sound folder)

TextButton
A button made of Text which will execute an action when clicked on or when its shortcut gets pressed.

The proprieties are the same as the ImageButton except that image and uniqueimage are removed.

Code: Select all

text

Sets the text of the button.

Gauge
A vertical or horizontal gauge.

Code: Select all

image

The image used by the Gauge to be drawn. Attention, only images ending by "_empty", "_full" and "_fill" are allowed !

Code: Select all

type

Sets the type of the Gauge. HORIZONTAL for a horizontal gauge and VERTICAL for a vertical gauge.

Code: Select all

width

Sets the with of the Gauge ONLY if the type is set to HORIZONTAL.

Code: Select all

height

Sets the height of the Gauge ONLY if the type is set to VERTICAL.

Code: Select all

adjustx

Adjusts the Gauge's content X coordinate according to it's frame (usually a value from 1 to 5)

Code: Select all

adjusty

Adjusts the Gauge's content Y coordinate according to it's frame (usually a value from 1 to 5)

Code: Select all

alpha

Set's the Gauge's content transparency value if you wish to display the Gauge's background through its content. (A value from 0 to 35).

Code: Select all

now

Set the current value of the Gauge. Use a pre-defined value for this. Check below for a list of pre-defined values.

Code: Select all

max

Set the max value of the Gauge. Use a pre-defined value for this. Check below for a list of pre-defined values.

Image
An image to display on the screen.

Code: Select all

image

The image drawn on the screen.

Code: Select all

alpha

The image's transparency. (value from 0 to 35)

ItemIcon
An image which will display an item. Attention ! The item can only be used as an Icon !

Code: Select all

noexplain

If set to 1, do not show the item's description when the mouse is over.

Code: Select all

noaction

If set to 1, the mouse and the shortcut will have no effect.

Code: Select all

shortcut

Set a keyboard key to use the item.

Code: Select all

item

Set the item's number. A pre-defined value can also be put. Check below for a list of pre-defined values.

MagicIcon
An image which will display a magic. When clicked on, it will cast the linked magic. Also works with Skills.

Code: Select all

noexplain

If set to 1, do not show the magic's description when the mouse is over.

Code: Select all

noaction

If set to 1, the mouse and the shortcut will have no effect.

Code: Select all

shortcut

Set a keyboard key to execute the magic.

Code: Select all

magic

Set the magic's number. A pre-defined value can also be put. Check below for a list of pre-defined values.

Code: Select all

type

Set the type. 0 = Magic, 1 = Skill.

Code: Select all

image

An image which is drawn when no magic are set.

Text
Displays text on the screen.

Code: Select all

text

The text to be displayed on the screen.

Code: Select all

r

The text's Red value (from 0 to 255);

Code: Select all

g

The text's Green value (from 0 to 255);

Code: Select all

b

The text's Blue value (from 0 to 255);

Code: Select all

align

Align the text either to LEFT, RIGHT or CENTER.

TextArea
Displays texts which automatically goes to the next line. The width property is used to determine the maximum length of a row in pixels.

Code: Select all

text

The text to be displayed on the screen.

Code: Select all

r

The text's Red value (from 0 to 255);

Code: Select all

g

The text's Green value (from 0 to 255);

Code: Select all

b

The text's Blue value (from 0 to 255);

Code: Select all

align

Align the text either to LEFT, RIGHT or CENTER.

TextEdit
Text field where the player can input a text.

Code: Select all

r

The text's Red value (from 0 to 255);

Code: Select all

g

The text's Green value (from 0 to 255);

Code: Select all

b

The text's Blue value (from 0 to 255);

Code: Select all

align

Align the text either to LEFT, RIGHT or CENTER.

Code: Select all

length

Maximum length of the text in characters.

RadioButton
A Radio Button. Multiple radio buttons have to be grouped in the same Layout in order to work properly.
They have the exact same properties as the ImageButton widget.

Code: Select all

selected

Set if the radio button is pre-selected.

User avatar
GMSignPainter
Site Admin
Posts: 2840
Joined: Fri Oct 09, 2009 10:18 pm
Location: Lyon - France
Contact:

Re: Custom UI Tutorial

Postby GMSignPainter » Fri Feb 10, 2012 9:55 am

List of pre-defined Texts

Code: Select all

#HeroName

The name of the player's character.

Code: Select all

#HeroLevel

The level of the player's character.

Code: Select all

#HeroPercent

The current experience percents of the player's character.

Code: Select all

#HeroExp

The current experience of the player's character.

Code: Select all

#HeroHP

The current life of the player's character.

Code: Select all

#HeroMP

The current mana of the player's character.

Code: Select all

#HeroMagicExp

The current percent in the player's character's orison/magery level.

Code: Select all

#HeroMagicLevel

The current level of the player's character's orison/magery.

Code: Select all

#HeroTacticExp

The current percent in the player's character's weapon level.

Code: Select all

#HeroTacticLevel

The current level of the player's character's weapon.

Code: Select all

#HeroSkillExp

The current percent in the player's character's job/skill level.

Code: Select all

#HeroSkillLevel

The current level of the player's character's job/skill.

Code: Select all

#ChatType

The current chat type. (Normal, guild, whisper, etc...)

Code: Select all

#ChatEdit

The chat's writing input content.

Code: Select all

#PotionBoxCount

The current number of items in the player's potion box.

User avatar
GMSignPainter
Site Admin
Posts: 2840
Joined: Fri Oct 09, 2009 10:18 pm
Location: Lyon - France
Contact:

Re: Custom UI Tutorial

Postby GMSignPainter » Fri Feb 10, 2012 10:02 am

List of pre-defined values

Code: Select all

#HPNow

The current amount of the player's character's HPs.

Code: Select all

#HPMax

The maximum amount of the player's character's HPs.

Code: Select all

#MPNow

The current amount of the player's character's MPs.

Code: Select all

#MPMax

The maximum amount of the player's character's MP.

Code: Select all

#SPNow

The current amount of the player's character's Food points.

Code: Select all

#SPMax

The maximum amount of the player's character's Food points.

Code: Select all

#MagicExpNow

The current amount of experience in the player's character's orison/magery level.

Code: Select all

#MagicExpMax

The maximum amount of experience in the player's character's orison/magery level.

Code: Select all

#TacticExpNow

The current amount of experience in the player's character's weapon level.

Code: Select all

#TacticExpMax

The maximum amount of experience in the player's character's weapon level.

Code: Select all

#SkillExpNow

The current amount of experience in the player's character's job/skill level.

Code: Select all

#SkillExpMax

The maximum amount of experience in the player's character's job/skill level.

Code: Select all

#ExpNow

The current amount of experience in the player's character's level.

Code: Select all

#ExpMax

The maximum amount of experience in the player's character's level.

User avatar
GMSignPainter
Site Admin
Posts: 2840
Joined: Fri Oct 09, 2009 10:18 pm
Location: Lyon - France
Contact:

Re: Custom UI Tutorial

Postby GMSignPainter » Fri Feb 10, 2012 10:06 am

List of UI Functions for the Buttons

Code: Select all

ChangeBattleType

Change the player's character's battle type (Peace, Battle, PK).

Code: Select all

NormalChatButtonPressed

Switches from normal chat to guild chat.

Code: Select all

GuildChatButtonPressed

Switches from guild chat to party chat.

Code: Select all

PartyChatButtonPressed

Switches from party chat to normal chat.

Code: Select all

WhisperChatButtonPressed

Switches between the different persons you have recently whispered.

Code: Select all

ChatLockedPressed

Unlocks the chat.

Code: Select all

ChatUnLockedPressed

Locks the chat.

User avatar
GMSignPainter
Site Admin
Posts: 2840
Joined: Fri Oct 09, 2009 10:18 pm
Location: Lyon - France
Contact:

Re: Custom UI Tutorial

Postby GMSignPainter » Sat Apr 21, 2012 11:06 pm

Layouts

Layouts have two roles in the UIs.
- The first and main one is to align several widgets properly without having to manually set the coord of each widget. You only have to set the Layout's coords.
- The second role is to group the Radio Buttons.

The Layouts have the same common properties as the other Widgets.

They have one extra property however:
offset
This property determines the space in pixels between each widgets in the layout.

There are two types of layouts:
HBox and VBox.
HBox is the Horizontal Layout.
VBox is the Vertical Layout.

Layouts are very easy to use in the UI definition.

Here an example to create an Horizontal layout:

Code: Select all

UIName=MyFirstUI
{
   ...
   UILayout=HBox
   {
      name=Layout
      relx=50
      rely=50
      offset=10

      UIElement=RadioButton
      {
         ...
      }
      ...
   }
}


Return to “Custom Interfaces”

Who is online

Users browsing this forum: No registered users and 4 guests

cron